Monday, February 27, 2012

New Benchwork taking shape

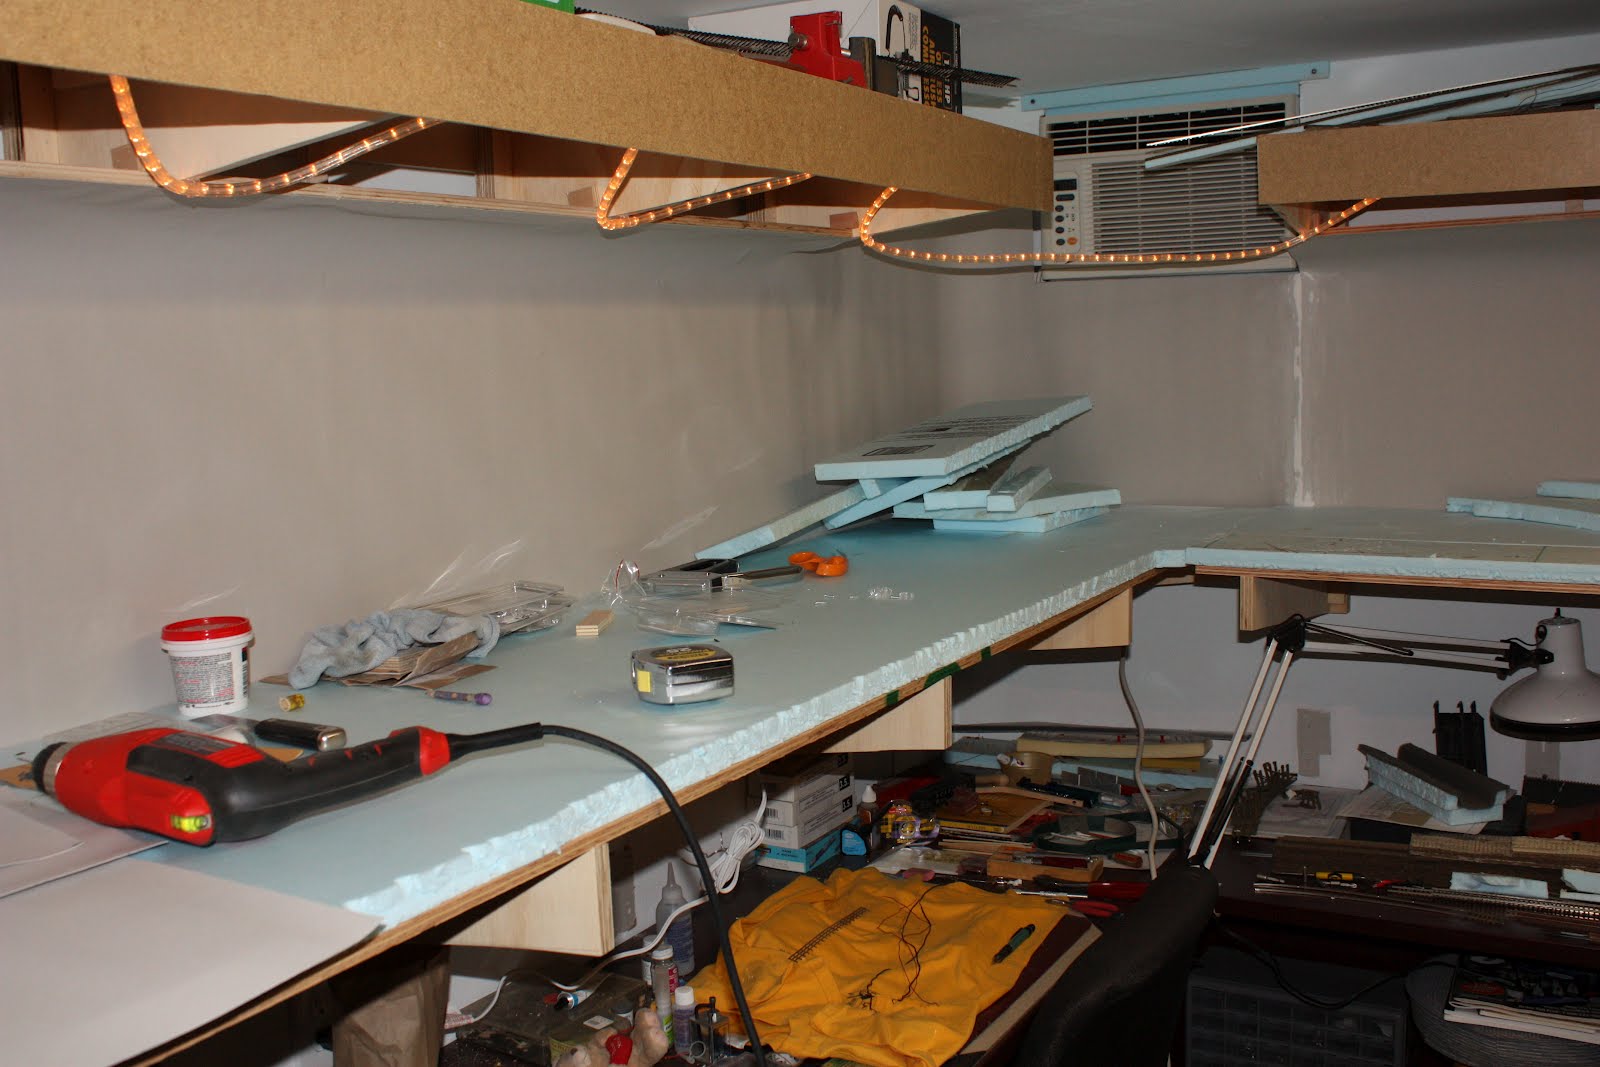
The new benchwork is installed and almost complete. It is 48" from the floor with a shelf 19" above the main level which will be where the railroad will be. I have installed vinyl flooring as a backdrop that I will paint with scenery. The lighting is rope light that is going to provide light for operations when the layout is completed

This is the new brackets for the benchwork. The horizontal boards are 3/4" cabinet grade plywood screwed to the wall where the studs are. The shelf brackets are also made of 3/4" plywood with the bottom bracket 22" deep and the top bracket for the shelf and lighting valance are 18" deep.
The sub layer is 1/2" plywood that will be covered with 1" blue foam. The background is vinyl flooring mounted with the back facing outward for painting.
Here you can see the vinyl flooring as it is clamped as the glue dries.

The background will be painted blue and have scenery painted to give depth to the scene. The white line in the backdrop is where the vinyl is spliced. I have used vinyl spackling to fill in the seam and it's sanded and ready for painting.

The shelf is 22" deep and will be covered by blue foam which can be shaped for scenery. The white line is the vinyl spackling that needs to be sanded.
There will be a valance around the top that will hide the rope light and finish off the shelf.
One of the reasons for redoing the layout was to allow for the desk I use as a workbench to be in the same room as the layout. This allows for working on locomotives as well as rolling stock and building structures for the layout in a climate controlled room.

Wednesday, February 8, 2012

Starting over

After several days of thought I finally decided that the layout was not going to work the way it was being built. There was not any real purpose to operating and after deciding to do away with helix there was no real purpose to having the incline that ended up going no where.


Here I have removed the track and DCC control system. Getting ready to remove the section of benchwork so I can start installing the new benchwork.

After cutting through the foam board this section is ready to be removed. All of this section will be removed and the new benchwork will be installed in it's place.

This is the new benchwork design. The lower shelf will be 48" in height and 24" deep. The upper bracket's are 18" deep and are for the valance to mount the lighting for the layout as well as a storage shelf on the top.

Saturday, September 24, 2011

Fascia for the Railroad

Some progress on the railroad with the fascia installed.

I am going for a rusted metal look for the fascia. So I have the bottom coat of orange on and I will put some dark brown to give it a rust color when I am done.

With the base coat on I will let it dry then add the dark brown in layers to give it a rust color. This are was where the helix was going to be but with it removed I have a small yard for switching cars.

Saturday, August 27, 2011

Building a swing gate with bridges.

It's been an interesting year and I realized this is my first post in quite some time. With Karen's mom passing away very unexpectedly in February most of my railroad time was used in trips to AZ with family business.

But I have managed to get some work done on the layout this year all be it time consuming on building a swing gate for access into the train room without having to duck under the section of track in front of the door.


This first photo sows the gate in the closed position. I used the same general construction that Charlie Comstock used in his model railroad Bear Creek & South Jackson. I have one bridge in place with the start of scenery underneath the bridges.
When the gate is in the closed position it's held in place with the brass road in the back just to the right of the bridge end. The small micro switch will be used for cutting the power to the tracks when the gate is opened. Wouldn't want a nice brass locomotive or any loco crashing to the floor when the gate is open.
I have removed the second bridge for now to allow for easier access to complete the scenery for the river bottom. The black paint will be where the rive water will be after I finish painting some more detail before adding the resin which will give it the final look of water flowing down the river.
With the gate fully open it allows easy access into the train room with out having to duck under a rather low bench work. It's been fun getting to this point as I have spent most all of my time working on this gate and building a second through truss bridge. The one on the left is just sitting in place for the photo and is the second one I have built. Once this section is completed and operational I will get back to working on the helix.

Saturday, January 22, 2011

Helping Out on the Unita Railroad

I made a trip to my friend Bryan Daniel's model railroad the Unita RR. Bryan and his friend Bob have made a huge amount of progress this past year. It was fun to see the scenery taking shape and all the work they have done since the last time I was there about three months a go.

This is a shot of the mining area just to your left as you walk in the layout room. The rock cliffs are made using the geodesic foam and cast satin reasons that I have been using on my layout. Bryan is modeling the Colorado scenery where the Unita railroad operated in the late 1800's and early 1900's.

This steal truss bridge that Bob built spans a large canyon that has two tunnel portals where the main line will run next to a river that will flow in the foreground. The section to the right is what I worked on that will be the river cascading down to the bottom under the truss's that support the bridge.


This is an areal view of the mining area with most of the scenery done. About the only thing left is to get the ballast around the railroad ties.


Friday, December 24, 2010

Out with the new and in with the old

Ever have one of those moments when you just realize that no matter what, things are not going to work the way you had hoped? Well, after getting this little railroad to the point of operating some trains it was obvious that my big spiral helix was not going to work. It was just to big for the room to allow for comfortable fit of people to operate trains. So I have removed the new helix base and installed the old one that I had originally installed. This has opened up the room very much and has made for a comfortable space to have operators as well as access to tracks and sidings to allow for operation.

This is the view of the original bench top that was going to have a helix up to the second level. Now it will be a single level with industry and a small town.
Access is now available to the three bridges area for operations. This was very difficult with the oversized benchwork for the spiral helix as access was virtually non existent.
Now with a nice wide isle two people can pass each other very easily. Now you may ask with no helix up to the second level, Just how will trains get up to the second level? Well thats easy, by way of the spiral helix that was removed. Just where will this spiral helix be located? Well thats for another post some day in the future but for now we'll just say it involves a hoisting system and a planed 6x 12 foot section of benchwork that will be out side of this railroad room. But that is some time down the road perhaps in 2012 this next year is going to just be getting this room finished and operating fully.

Thursday, November 18, 2010

The loop is complete


With the lift out in place across the door way the lower level is now complete with a loop for running trains around the room. It's fun to be able to operate trains now on the lower level.
With all three bridges across the river (not sure of a name for the river yet) this corner is now ready to have scenery completed.
This is one of the manual turnout controls that uses fishing line and a spring to control the turnout. By pulling out and turning the knob it pulls the line that pulls a wire that is connected to the throw bar on the turnout and the switch points are moved. By turning the knob back the return spring allows for the switch points to move back to the original position.

This is the other end of the turnout control the under side of the lay out. The music wire is the main driver of the throw bar for the switch points. The spring ensures a full return when the knob is turned back to the main position. The read and Black wires are the main bus and track feeders that run all around the lay out to supply the voltage to the track.